
Hi everyone, this is Christine from the What's Up, Cupcake? Blog. I was excited to see that the Crafty Christmas Club is back and I'm looking forward to seeing what awesome crafts everyone will be sharing.
As the holidays are upon us (we really only have two months?!), I wanted to get started on my crafty gifts. I saw these pincushion jars floating around the web in the last year and wanted to put together a tutorial for my version. They're easy to put together and are a great gift for your crafty friends.

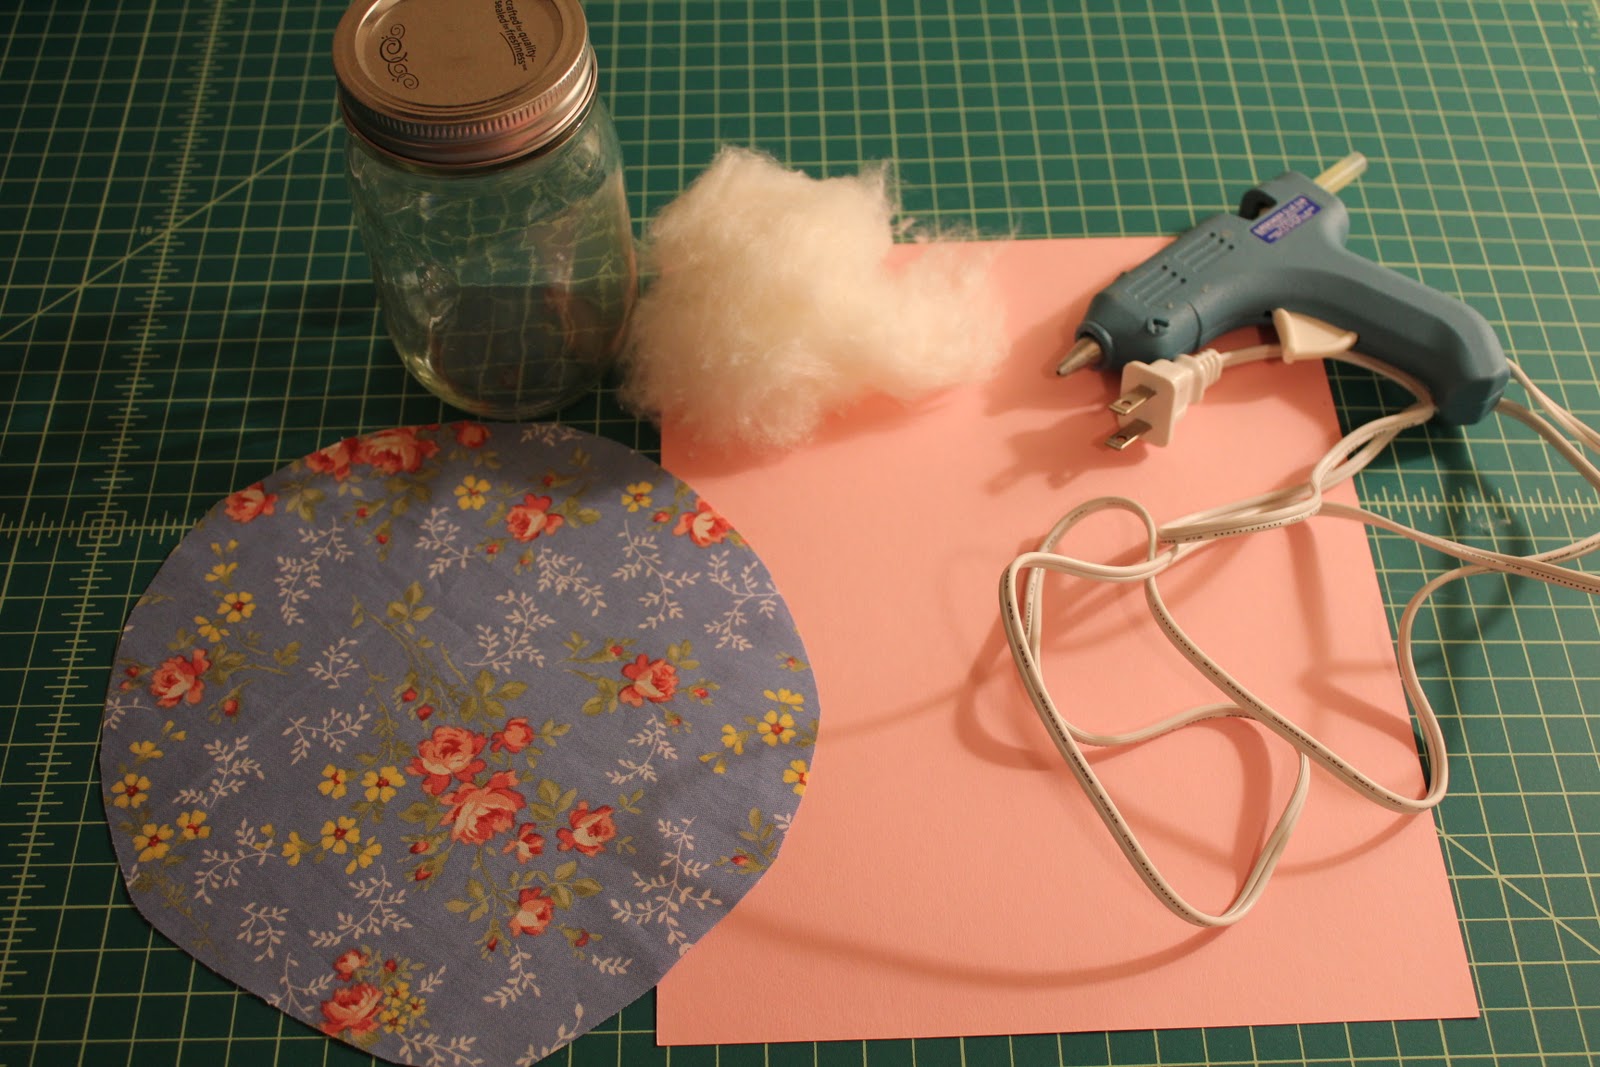
Time:
5-10 minutes. They come together really fast!
Supplies:
Mason jar - I use 8oz or larger so that it's a decent size to hold sewing notions.
Fabric scrap, cut a few inches larger than the jar lid
Handfill of polyfill/toy stuffing
Small piece of decorative paper
Glue gun
1. If you haven't already, cut your fabric scrap into a circle a couple of inches larger than the jar lid. I recommend cutting a little larger than you expect as you can always cut back the excess. Also, trace the inner lid piece onto the decorative paper. Cut out.


2. Now, take the fabric scrap and place over the main jar lid. Push stuffing into fabric, and cover with the inner jar lid.


Pull fabric tightly, adjusting the fill as needed until the pincushion shape is formed.

3. Cut off excess fabric, so that there is just enough to glue down and seal the pincushion lid. Using the glue gun, pipe glue onto inner jar lid and press fabric down.


4. Once the fabric is glued down, apply glue to top of fabric and apply decorative paper.

Your jar is now complete! Give as is, or fill with fun items for a craft gift. You can make a sewing kit by throwing in some little scissors, basic threads, needles, etc. Other uses could be filling it with buttons, zippers, or other sewing notions.

This is adorable! Forget gifts - I'm making a whole batch for ME!!! Thanks for sharing this great tutorial! x
ReplyDeleteThanks for the great tutorial Christine! I bought myself one of those jars last year from Amazon for £4 with the intention of making myself one of these (I'd seen some for sale but the shop-bought ones cost too much!) - and now thanks to your tutorial I'll be able to finally make one :)
ReplyDeleteFab tutorial, thank you! x
ReplyDeleteThanks everyone! I'm glad you liked it :) I had these on my 'to-do' list for a while, with all of the supplies ready to go. So I was really happy to find that they really were so fast to make up, and were a great use of scrap fabric that I was hesitant to throw away.
ReplyDeleteSo cute! I have been debating what to buy/make my quilting instructor and now I know! Thank you!
ReplyDeleteSo cute! Thanks for the tutorial, Christine.
ReplyDeleteAwesome, I wish I had a friends that like sewing. Just one for me and the little sister!
ReplyDeleteThis is quickly turning into a blog about things I want to make for myself...
ReplyDelete