Showing posts with label Christmas. Show all posts

Wednesday, 14 December 2011

Mushroom tunic

So many of you are posting tutorials and tips. My projects are mainly from patterns, so I only have projects to share, no tutorials.

Anyway, for the kiddo's little cousin I made a tunic. She won't be matching in a purple jacket, since I didn't have enough fabric.

It's tunic with a keyhole neckline and drawstring, pleats at the waist. I just love the fabric and think that the tunic could also work for this season with a long sleeved t-shirt underneath. We need more bright colours for winter! And in the spring it will work with a regular t-shirt underneath.

Blog post.
Länk

Monday, 12 December 2011

Oh Sarah O's Christmas To-Do List

Hello Everyone! My name is Sarah O of ohsaraho, blogger of all things artsy, crafty and fun. Christmas is less than two weeks away, which means that I am in full Christmas elf mode, knitting away on my last minute gifts, completing my last minute Christmas shopping, and wrapping up all of my Christmas gifts to place underneath the tree. Right now I have several projects on my knitting needles that I am hoping to complete. Here's a list of knitting pattern's that I'm hoping to complete this holiday season (note: if you have a Ravelry account you can click the link to view the patterns):

  • To Eyre... by Carol Sunday. This shawl pattern is based off of one of the shawls worn in the new Jane Eyre movie (which I have yet to see). I picked up some skeins of Ella Rae Classic wool in a grey/navy blue color for this shawl and can't wait to knit this up and check out the film.
  • Cambridge by Carol Sunday. I've had my eye on this shawl ever since I saw those paparazzi photos of Kate Middleton pushing her shopping cart. I've even caught myself thinking that I could shop like a princess, if only I had that shawl. I'm sure I could not afford the original, but thankfully there is a look-a-like pattern available on Ravelry. So this weekend I picked up some skeins of The Spectrum Collection Fluffy Stuff DK yarn in green and began casting-on this shawl. Check out my progress:

  • Wurm by katushika. This floppy hat pattern is based off of the hat worn by Michael Cera in the film Scott Pilgrim Vs. the World. It looks like a fun, quick knit, but I'm not sure of what colors and what kind of yarn I'm going to use.
  • Ribbed Watchman's Hat by Channah Koppel. This pattern was originally designed to create hats for Israeli (IDF) soldiers. I'm actually going to use this pattern to create a navy stocking hat for another soldier that I know whose a little closer to home.
  • Winding River Cowl by Kathleen Cubley. I recently purchased some beautiful Lion Brand Amazing yarn in Mesa and hope to quickly knit this up for a family member who often ventures West.

Friday, 9 December 2011

A -Slightly Psychedelic- Pompom Wreath

Only 2 weeks to go...!

Elisalex here, howdy!  With the majority of my presents done and ticked off the list, I'm now turning my attention to decorating...


For some reason, traditional Christmas Wreaths have always felt a little morbid and ominous to me.  Dark, spiky and somewhat reminiscent of funerals.  Beautiful, but depressing.  But then I saw this Pompom Wreath, and this tutorial from JCasa*Handmade, and I knew what I had to do.


For the wreath's structure I used some foam tubing from the hardware store and a coat hanger to create the shape -


Then made a bunch of pompoms in my favourite reds-dusty pinks-off whites colour combination and tied them securely onto the foam tubing.  To finish I wound around some woodland mushroom fairy lights I had (which I think look a little too acid-y when switched on, but perfectly cute -and innocent- left off) and attached a grosgrain ribbon loop so it can be hung. 


But no way is this wreath getting hung outside... I've become very fond of its sweet, not at all morbid or ominous, and very soft self.  I couldn't possibly risk it getting rained on or stolen, and most of all I want it inside where can appreciate it.

Wednesday, 16 November 2011

Sleigh bells ring, are you listening?

Hi, I'm Carly, I blog (somewhat sporadically) here.

Wow, Christmas has snuck up a bit this year, or is it just me? Looking back at my blog it seems I was feeling a lot more festive this time last year!

I have some crafty Christmas plans up my sleeve though, time willing:

Snoods! I have knocked up a pink flowery snood for some lucky person who shall remain nameless, here is me modelling it for now (doesn't it look pretty with my dress? I like looking like an explosion in a paint factory):


The pattern is available on my blog if you fancy making one yourself. I may whip up a few more of these, they're quick to make and make great gifts - who doesn't want to stay cosy?

I have also got a few cross stitch ideas in the pipeline - I want to make little necklaces and/or Christmas decorations. Here is a slightly larger one I made last year (bit frayed having been in and out of the frame rather a lot of times!), it's for the wall rather than round your neck but it gives you the idea:


And I'm also planning to give knitted headband/earwarmers, which look like this (I can't seem to rotate the photo for some reason):


They are made using a free Ravelry pattern. I love the colour of this wool, I bought it in John Lewis last year and never managed to use it as I only had one ball, but it was the perfect amount for this headband. Not good if you react badly to wool though - itchy ears are not a good look!

Aside from these projects I don't have any other firm plans, but I'm loving seeing everyone elses ideas here. Blogland seems so inspired in the months coming up to Christmas, I love it.

Speaking of crafty stuff, I take it we've all seen Pip's list of 307 handmade christmas gift tutorials? Inspirational!

Happy crafting ladies

Cx

Sunday, 30 October 2011

My Crafty Christmas plans

Hi, I'm Helen from Josie and May. This is my first time blogging with Crafty Christmas Club (thanks Tilly for setting this up!), but I did enjoy reading all the posts last year and I've been making presents for friends and family for quite a few years now.

I''m not making too many presents this year - partly due to the amount of time left, but mostly because I'm knitting this beauty for my brother in law -

He's been pestering me for a Mark Darcy sort of Christmas jumper for years, so last year he got the pattern for his present, with the promise of a finished jumper this year. So far I've finished the back, and am up to rudolph's nose on the front.


It's not perfect. There are a few places where I've switched yarns and it's a little loose or I've not wrapped the yarns properly, but nothing that can't be sorted once I've finished. And it's hard work having four balls of yarn on the go at once.


Last year I'd planned on making some decorations, and even got as far as buying the materials, but I was channelling my energy into finishing presents so never got round to them. (Also, as I'm don't spend Christmas day itself in my flat, I never feel like I *have* to decorate - sad, I know!).

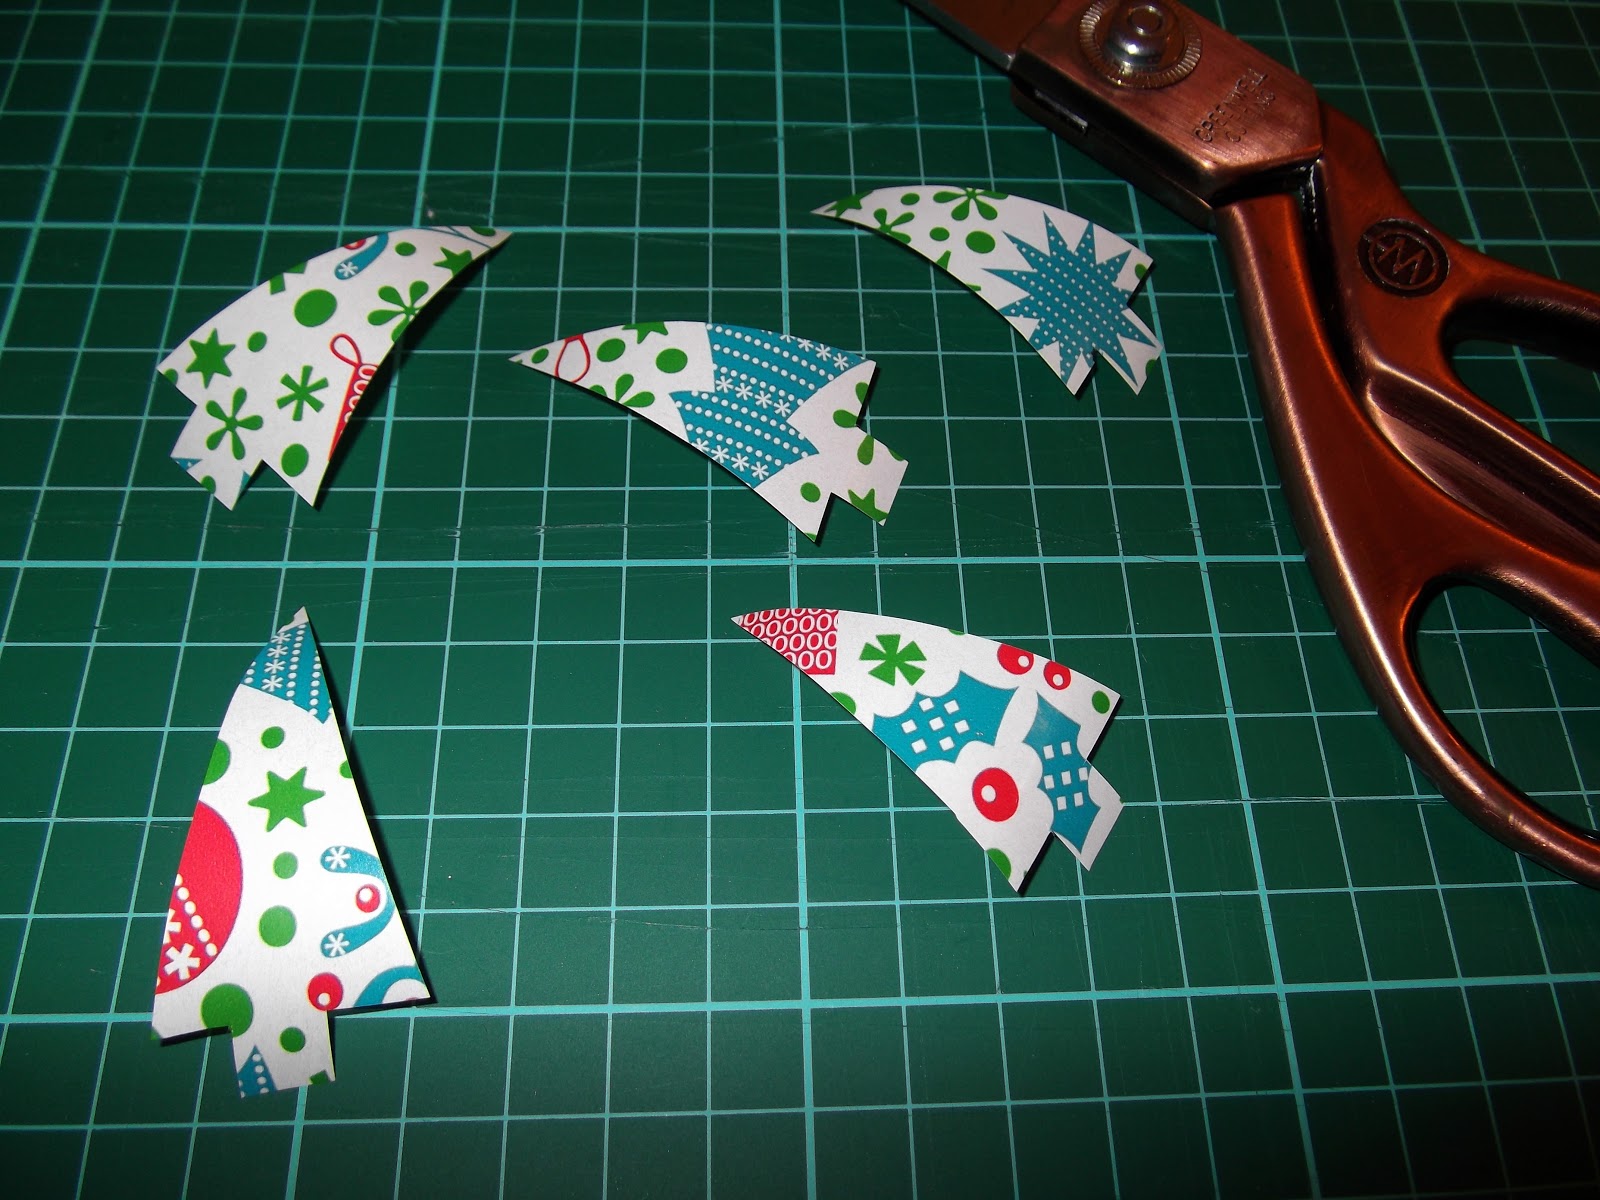
So this year I'm determined to make lots of decorations in short bursts to fill my flat with Christmas cheer. First on the list is Christmas bunting using these fabrics (from Beyond Fabrics on Columbia Road and Seamstar).


I may need more than these three fat quarters, but I'm going to see how many triangles I can get from them before I start buying more!

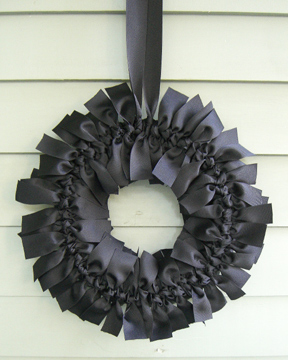
And no home is complete without a wreath. I fell in love with this ribbon wreath when I spotted it last year.
http://thelongthread.com
This all black one is for Halloween, but I bought green, red and gold satin ribbon from a market stall last year (I'm hoping I don't regret not getting grossgrain ribbon, but the amount needed would cost more than I was comfortable spending). Rather than buy a foam wreath I got some wire, so I may need to pad that out a bit before I start tying the ribbon.


But then this year I spotted this on Pinterest. So if I can find the foam wreath then I'm hoping to make this one too. What? More Christmas wreaths than bedrooms is totally ok, no?


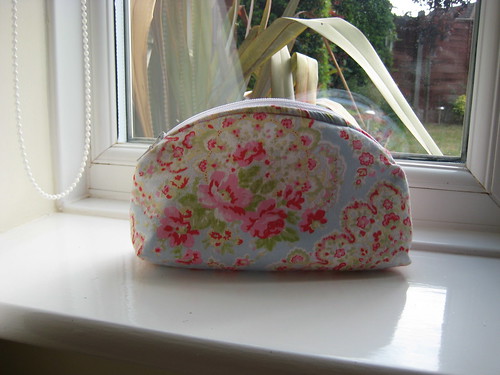
I will be making a few make up bags using Flossie Teacake's excellent pattern for presents for friends and family. Best £3.50 I've spent on a pattern - I've made so many of these!

Slouchy make up bag

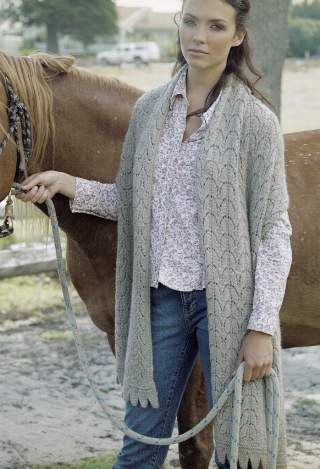
I've been planning on giving my Mum this shawl from a Rowan book for, oooh, probably 5 years. That's how long I've had the book and the yarn (Sirdar Wash and Wear double crepe dk). But it took me a long time to get my head round the lace pattern, and now that I have the brother in law's jumper is getting in the way! Hopefully this will be ready in time, but if not it'll make a lovely Mothers Day present.
Kashmir Shawl in Rowan classic alpaca (book 13)
Source: www.englishyarns.co.uk
So that's the crafting sorted, and I haven't even thought about baking! I'm organising and taking part in a Christmas bake-off at work, so any suggestions of Christmas themed goodness kindly accepted!
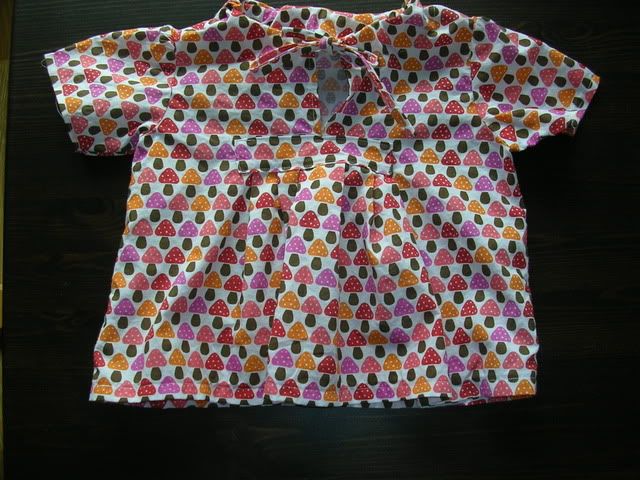
Saturday, 15 October 2011

My List

Firstly, a big Helloooo! to all fellow crafters and Christmas aficionados, and secondly, a huge thank you to the lovely Tilly for dreaming this up and making it happen.

I'm Elisalex of Stitch me Softly... Fairly new to blogging but no stranger to creative DIY; I was wondering how I would go about keeping my Christmas crafting secret, while also wanting to share it on my blog... So I couldn't be more thrilled to be a part of this network, not only to share my ideas and preparations and absorb the collective inspiration, but also allowing me to unashamedly express my excitement about the coming 9 weeks of pre-Christmas festivities!  (Anyone else notice how non-crafters think it's crazy to be getting excited about C-day mid October?  What they don't realise is the time that goes into a handmade holiday...)


So, without further ado, my To Do:

Decor
  • embroidery hoop tree ornaments (that will also double up as little gifts) along the lines of this:
source
  • crochet snowflakes, (endless patterns here) and this year I will starch them to keep their shape.
  • a wreath.  I've never had a wreath, let alone made one, but having seen some beautiful not-so-traditional wreaths, I'm feeling compelled to get involved.
source

  • stockings.  I made a fairisle one last year for my son, and I can't deny I felt a little jealous on Christmas morning!  So this year I'll be making a couple more chunky cabled stockings like this:
source

Food


  • Christmas Breakfast Buns from Xanthe Milton's Eat Me.  Beyond delicious.
The Christmas Present List is soon to come... Just need to wrap up some Autumnal projects before I completely immerse myself into all things Christmas!  Until the next time, over and out.


Tuesday, 21 December 2010

Wrapping is underway.....

It's funny how writing about the things that you do, makes you realise "stuff" about yourself. I am pretty methodical when I approach projects. Sometimes I look at the ordered manner of things in process and think "wow, that girl has control issues!!" Then I remember that "that girl" is me,and put it down to simple efficiency!

When I'm wrapping lots at once, I  keep everything pretty uniform and identical. It's quicker that way. Much as I get a kick out of gift wrapping, I don't have the time or inclination to spend days on it! I'll wrap everything first, then embellish and label them all in one go. (I use trusty post it notes to keep track of who's gift is who's). .Here they are all stacked, labelled and ready.

Next phase will be to add tags and embellishments. I have my handmade tags all ready to go as per the tutorial I posted. I have all my ribbon ready as well. I've just bought some red matt metallic paper that I'm going to try as pleated bands wrapped around each gift. Not sure of the detail yet, or whether it will work out, but that's the plan for tomorrow. Would love to see other peoples wrapping on here!

http://portialawrie.blogspot.com/search/label/Crafty%20Christmas%20Capers

Wednesday, 15 December 2010

Perfect Gifts for Fellow Sewists (inc Tutorial)

Today was my last day at college until the new year. I wanted to give my fellow dressmakers a little something. Some time ago, I'd stumbled upon this tutorial on Martha Stewart's fabulous site, and decided they'd be perfect. And they were. Cute AND quick.


I used some of the fabric left from my Christmas aprons, as it's such a pretty floral. I made up the pincushions as per the tutorial, substituting the "leaves" in Martha's version, for pretty vintage buttons on mine, top and bottom. I secured the buttons with the embroidery floss, wrapping the loose end around the thread shank and tucking it undeneath the button to finish it.

I wrapped them in some polka dot cellophane (from my local florist) tied with a white ribbon. If I do say so myself, they looked soooo cute. All done in one evening, whilst relaxing in front of the TV with a glass of Rioja! Thanks Martha! I rather fancy making a giant one of these for myself.....


Happy Christmas all, With Love & Best Wishes, Portia.xxx (Miss P)

Sunday, 12 December 2010

Christmas Aprons......

Further progress on my Simplicity 2512 will have to be stalled while I knuckle down to sewing up a couple of little cuties for J's Mum & Nan for Christmas. From my stash I've dug out a lovely chambray for the main fabric and a Cath Kidson floral (which began life as a duvet cover!) for the contrast.

The pattern is Butterick, a collection of 1950's style pinnies that I bought about 2 years ago as a beginner project but never used. The final aprons will be a "fusion" of the styles on the envelope. A half apron, with a wide shaped waistband and ties, with 2 patch pockets, one floral and the other cut from the chambray but emroidered with each of their names.

I didn't like the shape of the waistband piece, so did a little re-shaping of my own. It's testament to what a bit of practice and training can do for your sewing confidence. When I bought this pattern I was too scared to even cut it out, let alone start adapting the design and reshaping the pattern pieces. Hopefully finish these tomorrow....

Thursday, 9 December 2010

Super Quick Handmade Gift Tags - Tutorial

I wanted to add a handmade touch to my shop bought wrapping paper,and these are REALLY quick and straight forward to do! I already had everything needed either in my stash, or by making more use of what I had already bought for my wrapping scheme. So not only will they match inperfectly, but they're low cost too.

Once you've assembled all your supplies, you could run a dozen of these up in 15 mins (not kidding, that's all it took). They're so so simple to do, and you can vary the materials to give dramatically different looks. You'll need: wrapping paper, pencil, scissors/craft knife, glue/spray mount, tags/card,buttons, ribbon/cord. (/=or)


First step is to cut your wrapping paper shapes . These can be as simple or as complicated as you like. Being a bit of a slave to a theme though, I decided on geometric Christmas trees. I drew the design out on the back first, layered several scraps of paper and cut them all in one go.


Then glue the shapes to your tags or card. You could add other embellishments. Beads, sparklies, glitter, you name it. Whatever tickles your fancy or ties in with your scheme.


Loop ribbon or cord first through the button, then through the tag, then loop the loose ends of the ribbon through itself behind the button and gently pull tight, until the button sits snug against the tag. Et voila! Simple cute and unassuming.

Christmas Colour Palette

I bought my Christmas wrapping paper weeks ago. I don't tend to use "normal" wrapping paper. Preferring in the past to use poster paper, wallpaper, parcel paper, and florist cellophane to name but a few. I tend to like my wrapping to be a little outside the norm and look handmade. As if it's taken alot of time, thought and effort (which it usually has) if not alot of money (as we're seemingly always short of this!)

However the wrapping paper in question (above) was a mere 99p per 10m roll from Aldi (gotta love Aldi). So my money saving credentials remain intact. I've made my own gift tags to match (tutorial to follow) so my handmade credentials are also intact. Handily, I don't have to spend time agonising over a colour palette. It's all there in the wrapping paper.

A quick trawl through my supplies turned up these metallic red bells left over from last year's wrapping scheme.I incorporated them in my present toppers, so every time someone picked up their present, it would jingle in a festive fashion. Cute. I wired them with tigertail & bead crimps, so they're ready to use. Bit of time saved there, as that was a REALLY fiddly job last year!

I also love these traditional candy canes, so Ill fit these into my scheme too. Probably hanging on the tree ( but not on the door wreath!!). For some reason I'm loving childhood nostalgia even more since The Little Tornado came along.  This year is his second Christmas,and I just know he is going to be sooo excitable come the big day.

I bought the ribbon  from Ebay. (£6.20 inc P&P  for 10m each of Red, Green & Turquoise and 40m of narrow white ribbon. Bargain I think!) I was a little worried about trying to colour match from an online photo but needn't have worried. They match perfectly, and she's a great seller.

I also dug out these china teacups that I've had stashed for a couple of years (yes, I know. My name is Portia, and I am a hoarder.). I think they'll make great festive teacup candles (tutorial here) and will fit beautifully into the scheme. I 've a few other things planned. Mostly with a bit of origami and some papercraft.  Snowflakes, paper chains and the like. And so it begins.......!

Wednesday, 1 December 2010

Vintage Teacup Candles

The other day I thought I'd have a go at turning my vintage teacups into candles. I've never tried any form of candlemaking before, and was pleasantly suprised by both the finished result, and how easy it was. I can feel a bit of a Christmas production line coming on.........

To begin with pop a pan of water on the hob to boil, place the wax pellets into a metal mixing bowl (you could also use glass) and place the mixing bowl  over the pan of water.  Once the water had started boiling, I turned it down to a simmer and the heat began working it's magic on the wax pellets in the bowl. Within a few minutes, they go from white, to a clear liquid as they melt.

Whilst the wax melts, cut the wick to the required length, dip one end in the molten wax and push it into the little metal "wick retainer". Hold for a few seconds so the wax sets and the wick should now be held pretty securely within the wick retainer. Put a couple of teaspoons of the molten wax in the base of the teacup and push the wick retainer into it. (mind your fingers as the wax is still hot!) The wick should now be "set" into the base of the teacup.

In preparation for pouring the wax into the teacup, the wick needs to be held straight and upright whilst the wax sets.  To achieve this I wedged the wick between two knives, but tying it around a knitting needle would probably work as well. I guess it depends on how much wick you have left to play with and what you find easiest.

Once the wax is melted and ready to pour into the teacup,  you could add some scent or essential oil to the wax to perfume your finished candle. The kit that I had bought had a little bottle of cinnamon scented essence included.  Perfect for Christmas! But I guess you could add most essential oils, (lavender, ylang ylang, patchouli, citrus to name but a few) and tailor it to whatever occasion, mood or preference you like. It is best to add it JUST before you pour the wax into the teacup (give it a qquick stir), since the perfume evaporates whilst it is in contact with the hot wax.  As soon as it is poured and begins to set, it "locks" the perfume in.

It's probably a good idea at this stage to carefully transfer the molten wax to a jug to make it easier to pour (especially if you're as accident prone as I am!). The kit instructions said to fill 3/4 and allow to set for 30mins, then top up with the rest of the wax.
I'll admit I'm impatient and ended up pouring the whole lot in at once, so my finished candle dipped in the middle a bit, with no wax left over to level it.

Click to enlarge
It's then a question of leaving it to set for 24 hours, and it's ready to light, or wrap up and give as a gift (if you can bear to part with it!) You could glue the cup to the saucer to secure it or keep them as two seperate parts. I can't decide, as it feels wrong to put superglue on something so pretty. Overall, I'm pretty chuffed with my first attempt. My imagination is now running away with me, thinking or all the other things I can stick a wick in and fill with wax.............

http://portialawrie.blogspot.com/