Showing posts with label bags. Show all posts

Saturday, 31 December 2011

Rudolph's roundup

Well, I think my big list of potential makes was a tad optimistic! An awful lot of my time (far more than I had originally anticipated) was spent knitting the rudolph jumper.

I'm not going to lie. It was a hard make. Perhaps not the best pattern to knit my first jumper from. That may be a little harsh though - the plain red bits were fairly straightforward, it was just knitting the reindeer that slowed me down. It wasn't until half way through I finally figured out how to strand properly, so inside the top half looks all neat and tidy, like this....

Whilst the bottom half looks a fine mess...

I had a few heart stopping moments though. When I reached the top of the antlers, I realised I'd forgotten to shape the armholes. The thought of having to frog 20 rows made me feel more than a little sick, and I didn't touch it for a week - I didn't want to make yet more mistakes by rushing into correcting it. And then when I knitted the neckband to join the front and back together the night before I was due to go back to my mum's, I realised that I couldn't fit it over my head, so there was no way it would fit over my brother in law's head. Rather than have to frog and reknit the neckband, mum had the genius idea of using buttons on the shoulder. This led to a last minute dash to a local knitting store with my mum (about 30 mins before it was due to close on Chistmas eve) to find some suitable buttons...


Still, it was suitably appreciated by the new owner, who modelled it with great aplomb. He even wore it down the pub on Christmas day (although, sadly no photos of that!).


OK, so there's no sleeves, but I think he carries it off! Plus, what else could his present be next year? I still seem to have quite a lot of red yarn left, so I put some of it to good use when wrapping.

I'm still loving the Christmas bunting though, and I might make some more bunting next year in the smaller size for the other shelves. Sadly the ribbon wreath didn't work out. I'm not sure if it was the type of ribbon I bought, or using a wire form rather than foam, but after adding about 20 bows, I realised it looked more like something to be used when dancing round the maypole, rather than a classy Christmas wreath. Next year, I'll attempt the felt flower wreath now that Adele has pointed me in the right direction of foam wreaths!

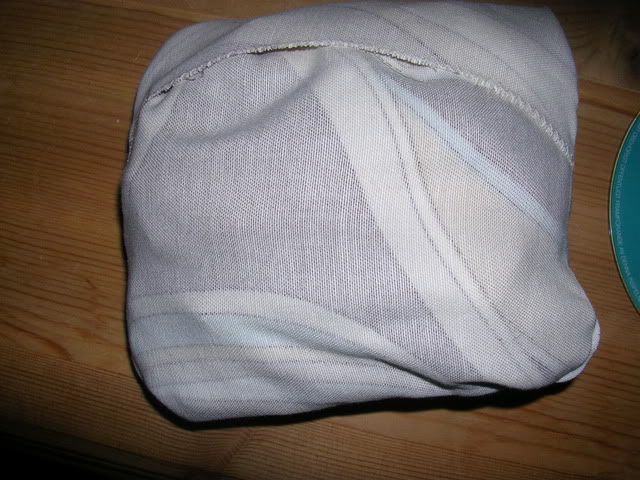
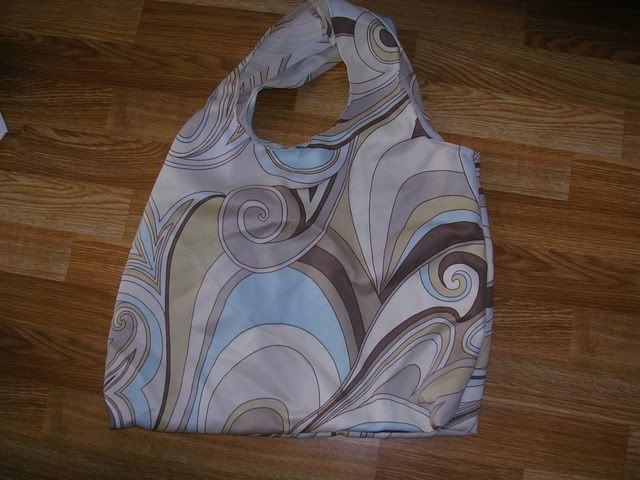
And while I keep thinking that's all I've made this Christmas, I also made a fair few make up bags and tote bags.


So, that's it for 2011.  See you all next year!

Friday, 30 December 2011

Round up of Christmas presents

Here is a little look at some homemade Christmas presents. Both the ones I made and gave away and the ones I got. For more inspiration check out my Pinterest board "Making Christmas Gifts 2011" and my blog Eddie's room.


IMG_0047

A bag I made for my husband with embroidered (not by me) birds (he is a big bird fan)

IMG_0036

A tray my husband and I decoupaged with maps for my little brother who is studying geography.

IMG_0150

I made a couple of these porcupine pin cushions for my mother and sister using this wonderful tutorial from Prudent Baby

IMG_0144

I made these Christmas stockings for my husband and myself using this free tutorial.

IMG_0139

My sister made this vinyl record bowl for my husband. There is a free tutorial for this here.

IMG_0146

She also made him this fab pencil case for his art pencils.

IMG_0141

For me she made this pretty shawl which I can't wait to use.

Monday, 19 December 2011

A Fishy Case... for a Fly Rod and Reel

Hello fellow crafters! It's Amy from Sew Well getting in some last minute crafting just in time for Christmas. Today I have a gift for my dad.


A few weeks ago when I was talking to my dad on the phone, he mentioned that he needed a fabric case for his fly rod and reel but that he didn't like the ones in the store. Since it seemed like the perfect Christmas gift, I offered to make it for him if he'd send me a diagram and measurements of what he wanted. The picture he sent me was of a 30" long set of pockets with a cover flap next to a 24" long pocket.


My dad's fly fishing rods break down into four pieces for easy storage. When he's ready to store his rod and reel, he'll place the end of the rod with the reel in the open 24" pocket and the other three pieces of the rod in the 30" pockets. He'll then cover the end of the three 30" pockets with the fabric flap and tie the straps located on the end of the cover around the whole thing to keep everything in place.


Because the rod pieces aren't all the same thickness, the pockets aren't all the same widths. The 24" pocket is 3" wide, the neighboring 30" pocket is 2" wide, and the final two 30" pockets are 1" wide each.


I added a bit of the nice waterproof, outdoor-quality fabric I had left over from the bag I made him to carry his boots and waders to the bottom. Hopefully it'll add a bit of heartiness to the bag. There's no seam at the bottom either. Instead the fabric is simply folded over, so the rods won't be able to work themselves out. I hope he likes it! If so, I'll be making three more so that each of his rods will have one.

Sunday, 18 December 2011

Ready Or Not!


As I was saying, Christmas is on the same day every year and frankly I thought I would never make it on time this year.
But little by little, I am almost finished. I only have 7 of those toiletries bags (tutorial here) to make still (2 more than I previously thought as I heard my husband and my son say out loud: "Wow! these are really cool!"), I managed to to send the big box of gifts to Canada on time and I have started work on my Christmas dress! If anything doesn't get made, it might be it, but no panic, I have plenty.


I made a few more of these tags and long time readers of my blog will not be surprised to see I have managed to scrape a few scraps of Alexander Henry's Thunder Flower into submission (I couldn't throw any of it away, I love it so much), I made 2 more girl toiletry bags with them.


A small one and a bigger one.


If you have time to surf, I do have a small contest/giveaway going on, the first to spot the mistake on the Zelda costume will get some vintage trim from my Etsy shop.
Merry Yuletide!

Thursday, 15 December 2011

Last minute gifts

Well, I left my crafting a bit too late and so I only have two fairly meagre offerings for you all!
I finished both of these last week, and I've written more about them on my blog.

These are jars filled with herbs, and I've painted the lids with blackboard paint so that they can be relabelled easily. I'll give them with a chalk pen once I've written on them.

This is a bag for my Mum's knitting to go in while she commutes each day. It's a simple square with rounded edges and is lined with cotton wadding. I used a magnetic clasp which is under the decorative button.

Hope you're all further advanced than I am!

Monday, 12 December 2011

White Elephant wristlet


I've got plans to make about two or three more of these types of bags, based off of A Lemon Squeezy Home's tutorial. I've only got this one completed so far, but thought I'd share now just in case anyone is interested in using the tutorial. I added a strap so that the bag could be a wristlet, which is more portable in my mind than just a clutch.

I made this one for the white elephant gift exchange at work. The owner of my company (male) got it, and I felt a little bad that he ended up with it. But he said that he'd plan to use it to hold his tees when he goes golfing. Go figure.


Saturday, 10 December 2011

A clutch and two wallets

Hi, it's Aleah from no time to sew. I've finished a few gifts! Having sewn garments exclusively for a while, I'd kind of forgotten how quickly little bags/pouches go together (and how little fabric they use), and I was able to finish these three things in two evenings - crazy (for me, anyway)! First I have gifts for my interns at work, both from both from terrific tutorials from Noodlehead:

The top one (for my female intern) is the gathered clutch, a fun take on a regular zipper pouch that is really pretty and not really much more effort. I added a removable wrist strap by sewing a tab with a d-ring into the side seam and attaching a strap to a tiny dog clip. Her favorite colors are purple and black, so I was glad to find this fabric. The bottom item (for my male intern) is the zippy wallet. I love the pearl snap on the little tab! I added a key ring in case he wants to clip it to his keys or belt. It's so hard to find adult-male-appropriate fabric, but I like this plaid. It's a thin shirting, but I interfaced it with a sturdier interfacing. Check out all the other great tutorials at Noodlehead if you need a last-minute quickie gift!
I also made this wallet for my mom:

The pattern is this one from Dixie DIY. I made just a couple changes - I used a magnetic snap rather than a button/loop, only put in one money pocket, and I made my zipper pocket the same way as on my messenger bag instead of how she instructs. I love this fabric!
So that's all for now, but I hope I can keep up this pace for a while longer and have some more things to share soon. Happy Making!

Wednesday, 7 December 2011

Bags, bags, bags! (and tutorial links)

Hello fellow Christmas Crafters. This is Andrea from Stitch Parade checking in with an update on my pressie making progress thus far. I must confess it’s been great reading about your own progress and I’ve been inspired by the great present ideas you’ve all had.

With less than 3 weeks to go, I’m about 80% done but it’s been raining cats and dogs in Toronto for days so I’ve not been able to get pictures of all my makes. Today I’ll show you what I’ve got so far in the bags department. First up, toiletries bags for my dad and brother:


I learned to make these bags a couple years ago at The Workroom, a local sewing studio, but the process is super easy and I even fund an online tutorial for you over here. For these bags I was able to up-cycle wool materials from hardly worn trousers I rescued from a friend’s Goodwill pile. I figured the look was manly enough. What do you think?


For the ladies I made clutches using a pattern also from The Workroom. I used some leather scraps for two of them, quilting cotton for another two, and the leftover embroidered border denim from my Ginger skirt for the last one.


All bags, except for the leather clutches, are interfaced for structure, include an internal pocket, and are also lined with contrasting cotton fabric for a fun pop of colour.


If you are interested in making similar clutches I found this handy tutorial here. As an FYI, the frames can be bought from several vendors via etsy.


Hopefully we get some sunshine this coming weekend so that I can photograph some of the other presents I’ve made. Wishing you all days of absolute present making productivity over the next couple of weeks!

Messenger Bag Tutorial

Hi, I'm Aleah and I blog at no time to sew. I'm getting a bit of a late start on my Christmas crafting, mostly because I've been working on a production of A Christmas Carol since October so I've been practicing Holiday Avoidance in my personal life... but now I'm starting to get really excited about making presents so I'm kicking into gear!
I've just posted a tutorial for a small messenger bag, and I wanted to share it here for anyone with a bike commuter/bike lover in their lives, or just anyone who wants a cute adjustable-strap messenger bag! Here's a look at my design - it's got a three panel front with a pocket, and a bunch of internal pockets.

The full tutorial is here. Happy Making!

Sunday, 27 November 2011

First Christmas present done

Hello everyone! I'm Helena of Crafting my Own Style.I was a member here last year, for Christmas presents last year I made purses, toddler aprons and record bowls. This year I haven't felt the insiration, but after reading about all the process here, it came to me!

So yesterday I finished my first gift.

Yup, the first thing you'll see is that the pouch is inside out. I could figure out the instructions, they left much to be desired, especially for a novice project. But it does its work.
Folding it out you'll see that it's a fabric grocery bag - Burdastyle's Charlie to be precise.I whipped this up in a little over an hour and I think they'll be some more under the Christmas tree. I'm hoping the scrap bin won't disappoint me.

Making this bag set free a whole bunch of inspiration for me. I've already decided that my kiddo will get an apron (same as his cousins last year), perhaps an apron for my sister as well and some more Charlie bags.

Let's get crafting!

More information about my groovy grocery bag on my blog.

Wednesday, 23 November 2011

Cosmetics Bags


Hello there!
I finally started to sew for Christmas. I cut these a while ago, but didn't have time to touch them before yesterday, when I finally got to sew them all! These will go to my nieces who are getting big enough to want a neat toiletries bag when they go places.


The fabric is some polyester I picked up in an op-shop a while ago, the inside is quilting cotton in either sunshine yellow or burnt orange. I mixed the colours of the handles, the zippers and the inside so no bag is the same.


They are in need of a good pressing, but I couldn't wait to show you, they are so pretty! Now on to the boys' toiletries bags.

Saturday, 19 November 2011

Patchwork Tote Bag

Hi there!  This is Karen from Renegade Homestead, happy to report that for the first time ever I've finished one of my Christmas presents before the start of December.  And it's thanks in part to the Crafty Christmas Club!  After my first post, one lovely reader suggested I make my quilt-loving mother-in-law a quilt-themed tote.  This was my first quilting endeavor and though it's not perfect, I'm very happy with how it turned out.


I whipped right through this project by modifying a tutorial from noodlehead.  The fabrics include leftovers from my wedding last year and one of my husband's old work shirts.  I think it will be just right for summers on the beach... and my mother-in-law may need that reminder by the time winter is in full swing around Christmas.  

Thanks again to Sandra for the excellent idea suggestion and thanks to everyone reading for providing the motivation to complete this present in record time!

Saturday, 12 November 2011

Vintage Rose Frame Purse: Tutorial and Pattern

Hi everyone! I'm Tanya from Craft Couture by T.C. I posted this tutorial on my blog and thought I should share it here as well.

This is a frame purse I recently made:

Materials you will need:
Cotton Fabrics for body and lining

Fleece or quilt batting
3.5" (or 8.5 cm) metal clasp


Pattern or tracing paper
Sewing pins


Seam allowance: 1/4" (or 0.7 cm.)

Note: when you print out the pattern; please make sure that in your print properties, the scaling is set to "None".
The pattern is in a pdf format. So, the acrobat reader is required.

Sewing Body and Lining:

1. Trace the pattern on to the fabrics and cut main fabrics, lining fabrics, and batting according to the pattern guideline. Sew the batting onto the main fabrics (in this case, I use the sew-in type but if you use another type, just follow the manufacturer guideline).

2. We will start with the main fabrics, sew pattern A with B, then sew another piece of A followed by another piece of B: A+B+A+B

3. Trim off excess fleece/ quilt batting and then clip along the curve of the purse

4. Repeat step 2 and 3 for the lining fabrics

5. Insert the main focus fabric bag into the lining bag, right side together as shown in picture, then sew across the top but leave one side open

6. Then turn the right side out, press and topstitch across the opening(0.3 cm. or 1/8" seam allowance).


Sewing frame and purse:

I use pictures and instructions from the mini-coin purse tutorial.

7. fold the purse in half and make a mark; then align the mark with the middle hole of the purse frame (work on one side at a time)


8. Use pins to lock the marked position and the two ends, make sure that the lining is well tucked inside the frame (Tip: using stilletto or crochet hook to insert the lining inside the frame)


9. Roughly sew the frame with the purse body to lock the aligned positions


10. Using double threads, starting from one end, insert the needle under the frame to pass through the 1st hole of the frame then move to the 2nd hole


11. Once the needle pass through the liner (about 45 degree angle) in the back (Tip: make sure that it comes out just right next to the frame), insert the needle back through the liner close to the point where the needle first came out as much as possible -- then pass the needle (about 45 degree angle) through the second hole again to the front -- this will make your liner looks neat without seeing the stitches

12. Repeating the same steps but now move from the 2nd hole to the 3rd hole and so on ^-^


13. Work on the other side -- then You are DONE...Yeah!!

Please leave me any question or comment you might have. I will be happy to answer.

Thank you for visiting my blog and hope to see you again soon!