Showing posts with label cards. Show all posts

Wednesday, 21 December 2011

Christmas Chaos!

Hi all!

I'm Fiona and I have fairly recently started blogging over at Diary of a Chain Stitcher. I never got round to posting about my Christmas Crafting Plans (it's taking me a while to get into the swing of blogging all that regularly especially amongst all the Christmas chaos) but I have been determined to post about what I've been up to!

As I haven't long been crafting I knew attempting to hand make too many of my presents was just going to be pushing myself a little too far and would only result in a horribly stroppy me for the last few days before Christmas which no one would appreciate. So instead I've done a combination of handmade, produced with a lot of thought but not completely made by my hand and shop bought presents. As much as I'd like to give everyone handmade gifts I one don't have enough time and know that my handmade taste is not necessarily everyone's cup of tea.


My main made project was my Stepdad's iPad case (from this tutorial) with fun chemistry related lining! (He works in a lab) I love it because it looks very professional on the outside so he can take it to meetings but inside it's fun and colourful. I got the lining fabric from Spoonflower which I have only just discovered and highly recommend. There are hundreds of prints to choose from, and if you can't find what you want you can get your own design printed up.


I've also made my boyfriend some boxer shorts using a free pattern from BurdaStyle. They were really quick and fun to make so I think he'll be getting some more of those for his birthday! I don't have a picture unfortunately as I wrapped them as soon as I finished to avoid any accidental discoveries. The surprise is one of the best bits of a gift I think!

One of the gifts I'm most proud of is a cookbook I put together for my Mum and Nan filled with our favourite family recipes. It was a big and time consuming job but I really enjoyed it and it was very straightforward to do using the software on Blurb. They have lots of page templates to choose from which you just fill with the photographs and writing you want, press publish and they'll print up as many copies as you want, and speedily too.


I've made the majority of my Christmas Cards by cross stitching festive designs, which I also sell on Etsy. I can't stand how much printed mass produced cards cost in the shops and would much rather make my own which can be tailored to the recipient and the effort is always appreciated much more.

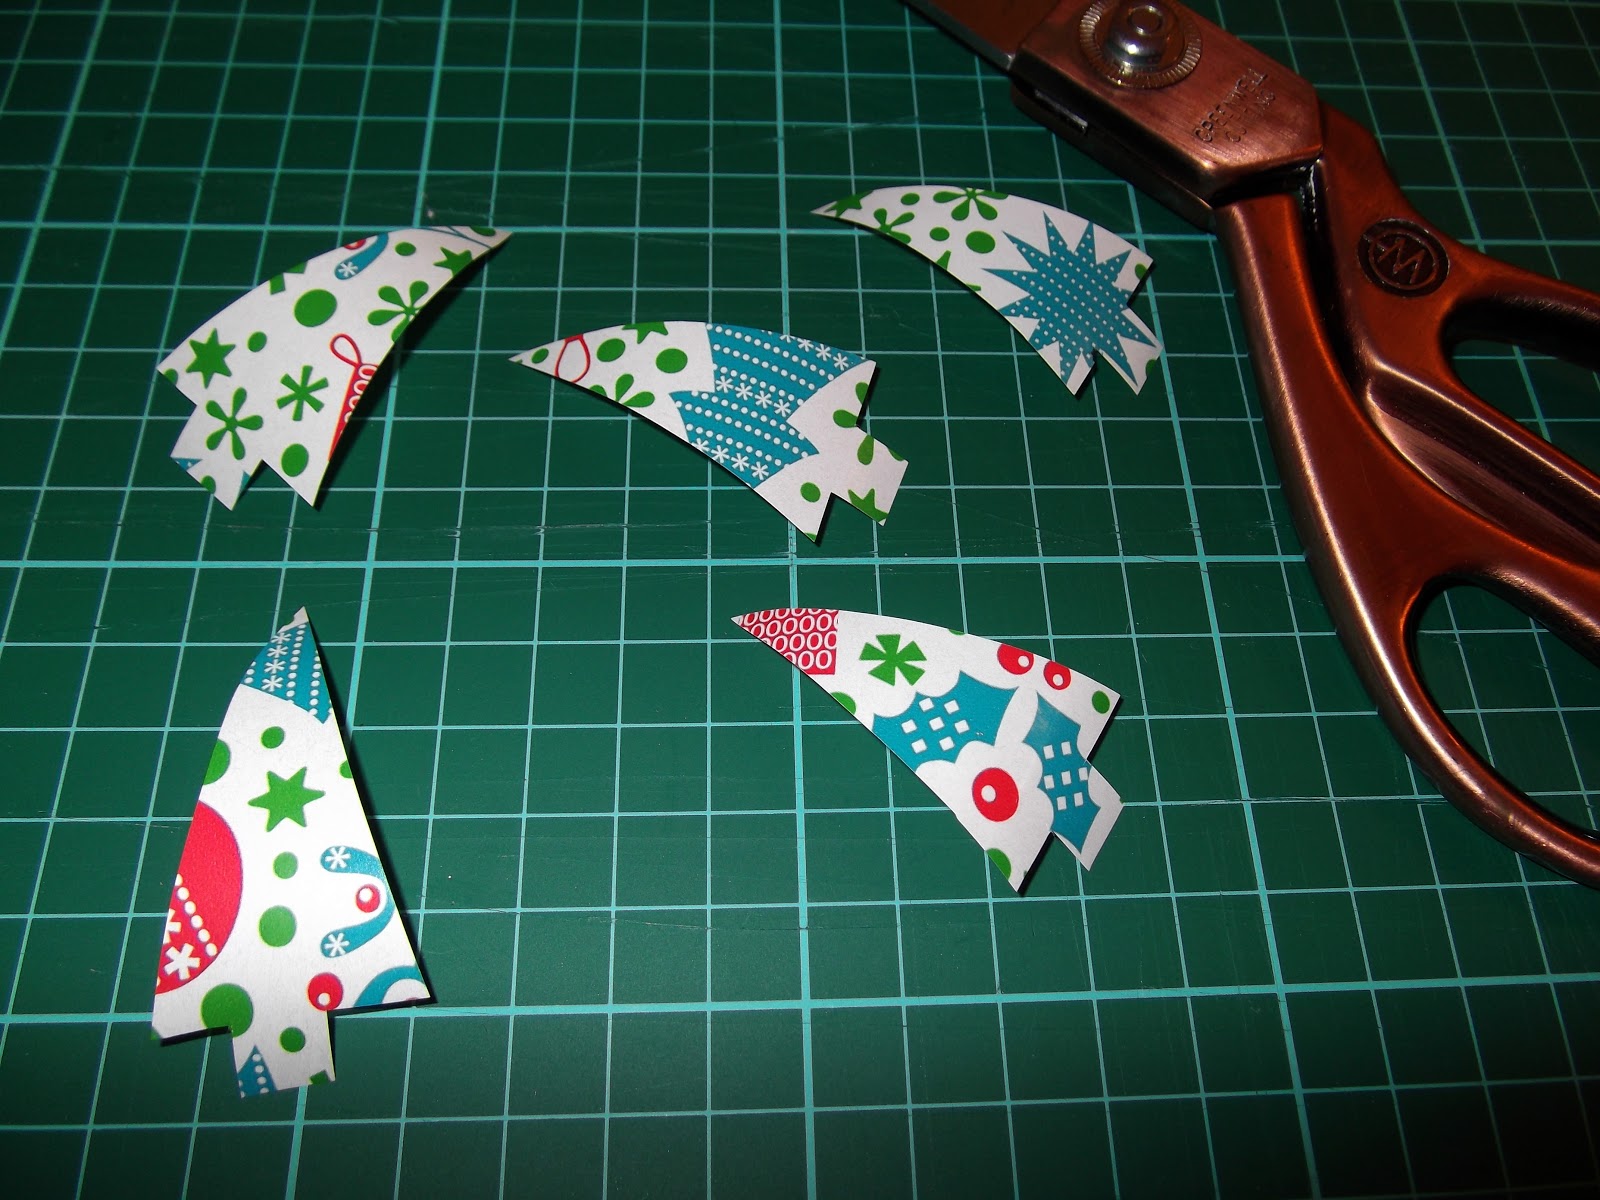
I've made a few Christmas decorations this year too including crackers, a table runner and these stockings:


Finally I've been doing A LOT of baking including some little Christmas boxes of shortbread for family friends who always send me a little something and who I never know what to give. A little discovery for everyone - shortbread holds up very well in the post! And this recipe for orange pastry is a winner!


Ooof writing this post has made me realise I'd actually done a lot more than I thought! Good luck with the last minute crafting everyone! Merry Christmas!


Sunday, 18 December 2011

Sewn Christmas Cards...

Hi, Pam here from Threading My Way...

I saw some fabulous sewn Christmas cards by Sew and the City and thought I'd make my own. Here's my first one...


Actually, it's my second attempt and my first finished card. Sew and the City suggested putting little dabs of glue on the back of the fabric to adhere the fabric to the cardboard so it didn't move when sewing. I omitted this step in my first attempt and of course, the fabric moved and puckered. I won't show you that attempt.

I decided to use double sided fusible webbing instead of glue and it worked like a charm. This card was so easy to make. Here's how I did it.

Fuse the Christmas tree to cardboard:
  • Fuse the Christmas tree to the cardboard using double sided fusible webbing and following the manufacturer's instructions.
  • Use an old cloth so glue doesn't get on the iron or the ironing board and to stop the cardboard from burning.
  •  Use a low setting on the iron so the cardboard doesn't burn.


Sew the Christmas tree:
  • Sew a zig zag stitch around the Christmas tree.
  • Sew the green card to the actual Christmas card using a zig zag.
That's all there is to it. 

Thursday, 9 December 2010

Super Quick Handmade Gift Tags - Tutorial

I wanted to add a handmade touch to my shop bought wrapping paper,and these are REALLY quick and straight forward to do! I already had everything needed either in my stash, or by making more use of what I had already bought for my wrapping scheme. So not only will they match inperfectly, but they're low cost too.

Once you've assembled all your supplies, you could run a dozen of these up in 15 mins (not kidding, that's all it took). They're so so simple to do, and you can vary the materials to give dramatically different looks. You'll need: wrapping paper, pencil, scissors/craft knife, glue/spray mount, tags/card,buttons, ribbon/cord. (/=or)


First step is to cut your wrapping paper shapes . These can be as simple or as complicated as you like. Being a bit of a slave to a theme though, I decided on geometric Christmas trees. I drew the design out on the back first, layered several scraps of paper and cut them all in one go.


Then glue the shapes to your tags or card. You could add other embellishments. Beads, sparklies, glitter, you name it. Whatever tickles your fancy or ties in with your scheme.


Loop ribbon or cord first through the button, then through the tag, then loop the loose ends of the ribbon through itself behind the button and gently pull tight, until the button sits snug against the tag. Et voila! Simple cute and unassuming.

Christmas Colour Palette

I bought my Christmas wrapping paper weeks ago. I don't tend to use "normal" wrapping paper. Preferring in the past to use poster paper, wallpaper, parcel paper, and florist cellophane to name but a few. I tend to like my wrapping to be a little outside the norm and look handmade. As if it's taken alot of time, thought and effort (which it usually has) if not alot of money (as we're seemingly always short of this!)

However the wrapping paper in question (above) was a mere 99p per 10m roll from Aldi (gotta love Aldi). So my money saving credentials remain intact. I've made my own gift tags to match (tutorial to follow) so my handmade credentials are also intact. Handily, I don't have to spend time agonising over a colour palette. It's all there in the wrapping paper.

A quick trawl through my supplies turned up these metallic red bells left over from last year's wrapping scheme.I incorporated them in my present toppers, so every time someone picked up their present, it would jingle in a festive fashion. Cute. I wired them with tigertail & bead crimps, so they're ready to use. Bit of time saved there, as that was a REALLY fiddly job last year!

I also love these traditional candy canes, so Ill fit these into my scheme too. Probably hanging on the tree ( but not on the door wreath!!). For some reason I'm loving childhood nostalgia even more since The Little Tornado came along.  This year is his second Christmas,and I just know he is going to be sooo excitable come the big day.

I bought the ribbon  from Ebay. (£6.20 inc P&P  for 10m each of Red, Green & Turquoise and 40m of narrow white ribbon. Bargain I think!) I was a little worried about trying to colour match from an online photo but needn't have worried. They match perfectly, and she's a great seller.

I also dug out these china teacups that I've had stashed for a couple of years (yes, I know. My name is Portia, and I am a hoarder.). I think they'll make great festive teacup candles (tutorial here) and will fit beautifully into the scheme. I 've a few other things planned. Mostly with a bit of origami and some papercraft.  Snowflakes, paper chains and the like. And so it begins.......!

Wednesday, 1 December 2010

"Look up at the sky and count the stars . . ."

Hi all! I'm Becca from http://becca-knithappens.blogspot.com/. It's now December and I've finally got round to doing something creative for Christmas. Hooray!

I spent the best part of yesterday afternoon leisurely making these minimum effort (but nevertheless cute) Christmas cards. A bit of cutting, sticking and paper layering. I only used white card, a bit of green, a bit of orange, and one magazine. Oh, and a trusty Stanley knife.


I found that the more I limited myself with materials, the more creative I was. And, each one's different so it didn't get too humdrum. I found http://www.biblegateway.com/ really helpful for the insides - I just searched 'stars' for some lovely verses, but of course, that's up to you.


This was super easy to do, and fun too. And now I can kid myself I'm more organised for Christmas than I really am! Great.

Hope this was helpful, happy crafting!

Saturday, 27 November 2010

Christmas cards with a sparkly gift!

Hello everyone!
I'm wowed by so many lovely ideas - seriously re-thinking some of my original ideas!

I've been beavering away creating some affordable pressies for selling at a Christmas Craft fair, but thought these ideas could also be little pressies for friends at work, or even adapted for a child to make to give.

I've made little jewellery presents & attached them to handmade cards as a true "gift card" (as opposed to those credit card sized pieces of plastic that you load up with cash to give to someone to spend in that store). I've a bit more info on my blog, but you can probably work it out!

First to show are wine glass charms (x 6, all different, otherwise what would be the point?!!) - on a Christmassy sketched card that shows it off like a belly ring! The other 5 are in the envelope as part of the present.

Then, for the other design I've lino-printed a Christmas tree (that took me back - sticking the lino on the radiator to warm it up a bit before cutting!) Then I've punched holes & stitched on a necklace to adorn the tree.


I'm sure there are lots of similar things you could do to mix card & gift in one go!
I've also made a non Christmas design with a flower brooch.

Back to sewing now though ... byeee!

Monday, 8 November 2010

Papercuts and Postcards

Hello everyone, I'm Lauren from Sewing Me, Sewing You. I thought I'd drop by to post some ideas I want to work on for Christmas prezzies - so far they are only ideas and I haven't actually got round to starting any of them.

The first one is papercutting. I saw an article in the Guardian about Rob Ryan and fell in love with what he does. I'd like to try my hand at paper cutting, though with a much simpler design than his which are like this...


I also like this from Green Chair Press blog...


The second idea was to create a set of personalised postcards, by buying plain blank ones and drawing, stencilling or decorating the postcards while leaving the address/message side blank for the recipient of the present to use, thus spreading the joy to others!

I'll post some pics if I manage to do either!