Showing posts with label children. Show all posts

Wednesday, 28 December 2011

Oliver + S Explorer Vest and a Knitting Needle Roll

Greetings, Crafty Christmas-ers!  I hope you all were able to finish up your projects before Christmas.  I completed my last Christmas gift on Christmas Eve morning thanks to a cold that decided to show up last week and knock me on my ass for a few days.

I made the Explorer Vest from Oliver + S' Little Things to Sew for my nephew.

Explorer Vest

I'm happy to report that he loves it!  He promptly shoved all of his spy gear into all of the pockets!

The pattern was really easy to follow.  I'm so excited to make more projects from the book.  More information can be found on my blog.

My last Christmas-y project was for my mom's birthday.  It is today and since she's getting back into knitting, I made her a roll to keep her knitting needles in.  I used the Tool Roll pattern from Lotta Jansdotter's Simple Sewing.  It was pretty easy to follow but I made a few modifications (more info on that can be found here).  Since I've been wanting one too, I made us matching needle rolls!  

Knitting Needle Roll

I don't know about you guys, but I am so happy that Christmas crafting is over!  I've had a great time reading about all of your crafting adventures.  Until next year!

Cheers,

Sunday, 25 December 2011

I'm still technically not done, but...

If you can't tell by this post, I'm a procrastinator. Thought I'd recap what I was able to give out (and technically finish) these past couple days, though I'm still needing to finish a couple more gifts. I hope all of you had a wonderful holiday and that everyone enjoyed your amazing crafty gift goodness!

Another pleated clutch, with layered fabric

Ginger schnapps, in single size jars

Shortbread

Cockroach ornaments, based off of Very Purple Person's tutorial

Poorly self-drafted capes

Felt-applique t-shirt

Diaper clutch, again poorly self-drafted

Earthworm ornaments

Thursday, 22 December 2011

A Father Christmas Pillow

Hello fellow crafters! It's Amy from Sew Well here again with another gift for my niece.


This little Father Christmas pillow perfectly sized for my niece was super easy to make.  The pattern was printed right on the fabric, so all I had to do was cut, sew, and stuff.  If only garments came preprinted like this!  Spoonflower, perhaps?

Wednesday, 21 December 2011

Christmas PJ bottoms

Here's my last bit of Christmas sewing - new PJ bottoms for my two boys.  I made them from cotton flannel: digger fabric for my younger boy and tartan for my older one.  They were very easy to make, all I did was use existing PJ bottoms as a pattern as outlined in this great tutorial.


I'd planned for them to be brand new on Christmas Eve, as this has always been our family tradition.  Not so easy I'm afraid, my boys loved them so much when they were 'modelling' them, they won't take them off! Happy Christmas everybody. x

Monday, 19 December 2011

Another Christmas Outfit...

Hi, Pam here from Threading My Way...

I finished my second Christmas outfit this week. The first one was for a little girl. Here's the second.


Once again I've used the 30 Minute Shorts pattern from Create HOPE Designs. This time I've sewn red topstitching along all seams, (except the inside leg) and above the cuff. I quite like the effect.

I added an appliqué of a star to the store bought t-shirt. Around the outside of the star, I've added two lines of running stitch in red and blue, to make the star stand out a little more.

Another quick and easy project. I still have lots of Christmas sewing to do. Let's hope I don't have to do a last minute dash to the shops because I don't finish all I've planned.

Sunday, 18 December 2011

A Wee Sparkly Christmas Top

Hello fellow crafters!  It's Amy from Sew Well again, here for another update on my holiday crafting.


I wanted my six-month-old niece's first Christmas to be special, so I made her a little red holiday top from a bit of sparkly fabric from Fine Fabrics and McCall's M5416. The fabric was three inches shy of being able to make the full length tunic, but as my niece is still a tiny baby and the pattern I cut was likely meant for a small toddler, I figure it'll be just fine with tights or over pants.


I cut the lining from a nice white cotton remnant I got from Britex the last time I was there. The pattern just calls for a facing, but I wanted a full-length lining to class up this baby holiday number. Though I hand pick stitched around the edge of the lining to keep the facing in place, it still peeks out a bit. Maybe it's a design feature to match the buttons? Next time I might use the identical fabric for the facing.


I used my narrow-hem foot for the hem on the fashion fabric but just pressed twice and stitched the lining hem. All in all it was a quick and easy project, even with the hand sewing. I hope she likes it!

Hobby-Reindeer

Hello, I'm Tors from Girl meets Wolf (previously Welsh Pixie) and I'm not sure about anyone else but I'm having a bit of a panic.

Wouldn't you know it, I've left it all til the last minute - a downside of my profession, no time left for anything else! And wouldn't you know it, the first thing I complete isn't even a present for my family, but for my friend's little boy! I'm sure the Law of Sod has something to do with this.

This hobby-reindeer came from Tone Finnanger's book, Sew Pretty Christmas Homestyle. Tone's creations are fabulous and really very easy to make. If you're a fan of Mollie Makes you'll have seen some of her work in this month's issue.

The stick is some cheap dowling from B&Q that I've left unpainted because I prefer it and also can't be arsed with all the painting so soon after painting a new-to-me dresser that took two weeks to finish. It'll be a while before I pick up a paintbrush again I think.

The nose and eyes are drawn on rather wonkily with some fabric pens, the ribbon came from eBay (and don't I just love it!) and the head itself is stuffed with hypo-allergenic toy stuffing from Hobbycraft. All in all this was a rather cheap and not particularly time consuming (although a little fiddly) project to complete.


Wednesday, 14 December 2011

X-mas Present #2 Done: Sock Monkeys


Hi, this is Stephanie from The Naked Seamstress with another x-mas present done! Yippee! My boyfriend and me made these cute Sock Monkeys for my boyfriend's little nieces. I did the sewing bits and my boyfriend stuffed the monkeys with ripped-up pieces of batting. We had great fun seeing how the monkeys came alive out of ordinary pairs of socks.

Hi, I'm John-Joe!
I used some buttons from my stash for the eyes and embroidery floss to put a smile on the monkeys' faces.

Hi, I'm Wallace!
There are many, many tutorials online for making Sockmonkeys. I used this tutorial combined with this cutting diagram:
Source: Making Martha Proud
The monkeys are really easy and fun to make (although the sewing on of the limbs can be a bit tricky) and I hope the little nieces will like them as much as we do.

Mushroom tunic

So many of you are posting tutorials and tips. My projects are mainly from patterns, so I only have projects to share, no tutorials.

Anyway, for the kiddo's little cousin I made a tunic. She won't be matching in a purple jacket, since I didn't have enough fabric.

It's tunic with a keyhole neckline and drawstring, pleats at the waist. I just love the fabric and think that the tunic could also work for this season with a long sleeved t-shirt underneath. We need more bright colours for winter! And in the spring it will work with a regular t-shirt underneath.

Blog post.
Länk

Monday, 12 December 2011

Inspiration and tutorials

I am so excited to be a part of the Crafty Christmas Club again this year. I have already begun making the presents for my family and I just wanted to show you some of the great tutorials I have been inspired by.
First I want to share with you the new Pinterest board that I have setup for this purpose: "Making Christmas Gifts 2011". I am a great fan of Pinterest especially if you can link through and find amazing tutorials.
One of my favorite is the Porcupine Pin Cushion  from Prudent Baby. It was so easy to make and look real nice - just something for the people in my life who love sewing.
Another of my favorites is the 3-way laundry bag by // Between the lines //. Its so easy to make and I have already made 3 for myself (check them out here on Grey Duckling) and 2 for family gifts.
Last year I made decoupaged a bowl with stamps for my husband and this year I have also been decoupaging a couple of gifts for the family (more later).
Finally I want to show you a picture of a couple of decoupaged Christmas decorations I made this year (see last years decorations here).  


IMG_0087 1

During the summer I decided to move more of my personal projects over to my own blog "Eddie's Room". Since I am now 8 months pregnant the latest posts have been about making baby stuff so if you are in need of inspiration for baby gifts you are welcome to have a look over there or on my other new Pinterest board "Creating for baby".

Unless I give birth before then I will be back soon with some pictures of the gifts I have made so far.

Eddie

Tuesday, 6 December 2011

X-mas Present Ideas: Pencil Cases, a Wall Organizer and a Painted Mug

Hello, Crafty Christmas-ers! My name is Stephanie and I blog over at The Naked Seamstress. I'm finally writing my very first post on this blog although I've been signed up to the blog since last year! I really enjoy reading all of your posts and have gotten many good x-mas present ideas from this blog both last year and this year. But somehow I never quite get around to writing blog posts at Christmas time. To make up for my absence I have decided to share three presents with you that I made for last years' Christmas. Maybe some of you will get inspired by these ideas to make up some presents for this year.

First up, are these cute little pencil cases I made for my four cousins in assembly line style. They are quite quick to make although you have to fiddle a bit to get the corners right (of which I had to sew 32!). They also require very little fabric so are great for fabric scraps. The tutorial I used to make them is from Annie Get Your Glue Gun and you can find it here.


The second present is a wall organizer I made for my mum. I used no pattern for it but had a look at the Tory pattern from Burdastyle for inspiration. I didn't use the pattern in the end because I figured that the purchasing, printing, sticking together and cutting out of pieces would have taken longer than just making the measurements up myself. And I think I was right. The wall organizer was very easy to sew but without the pattern you have to like doing a bit of maths.


The last present I want to show you is a painted mug I made for my mum's husband. I bought a set of mini ceramic paint colours and mini brushes in a craft's shop and I had a great time painting our little family, living in two countries at the time, on a mug.


I hope these ideas gave you some inspiration for your own Christmas crafting. I hope to post again soon with my current Christmas-y endeavors. Happy Christmas crafting to you all!

Sunday, 4 December 2011

How I Roll - Animal Blankets Out of Control

Hello fellow crafters! I'm Amy, and I blog over at Sew Well. I've really enjoyed keeping up with everything that everyone has been making for their family and friends this holiday season. I'm getting a late start posting over here, but I'll hopefully be able to get it all in in the next few weeks.

I figured I'd start with a few animal blankets I made for friends who just recently had babies. I used the Cotton Ginny's Animal Blanket pattern, which comes with patterns for a bear, elephant, and hippo, but I modified the patterns to better fit the recipient. Here are the results.

A pink unicorn for a little girl who's room is filled with magic and fairies.

A floppy eared dog for a little girl who's mom grew up with the greatest basset hound ever.

The blankets are simple to make and only require a sewing machine and a bit of hand embroidery at the end.

I hope everyone's having a great weekend. I'll be back soon with some more of my holiday crafting.

Until then,
Amy

Purple jackets

I've been having a sweatshop over here, sewing three, pretty much identical jackets (two of them are a bit bigger).They also have different zippers so that it will be easy for me to tell the bigger ones (pink zipper) from the small one (blue zipper). I know that the kiddo loves his, it feels cruel to make him wait for Christmas, but maybe then he'll have forgotten about it and be surprised all over again. (What to do next year when he will be more aware of what I'm doing. I must resort to sneaky sewing and no fitting).

The fabric is a sweatshirt fabric I found in the scrap bin and for the wristlets I chopped up an old failed project.

More pictures and information on my blog.

Monday, 21 November 2011

Lullaby Lamb Felt Doll

Hi, everyone! I'm Amanda from Virginia, USA. I blog over at Sewin' in the Rain and this is my first time posting at Crafty Christmas Club. I credit CCC for motivating me to finish my first handmade gift of the season!

A little girl in my family is turning 1 around Christmas so I made her this cute little "Lullaby Lamb" doll out of felt, fabric and embroidery floss! The pattern is a design from Gingermelon, an Etsy shop with a bunch of adorable doll patterns available. She's based in Canada but her patterns are sent through e-mail and I got mine almost right away!


The lamb came together pretty easily and I'm very happy with how it turned out. Basic embroidery stitches are used to join the pieces. The original doll height is described as 3.5" (~9 cm) sitting down so I doubled the size of the pattern pieces to get a larger doll. Most pieces are whip stitched together and then stuffed with polyfil, including the wee snout!

Materials include:
  • High quality woolen cream felt for the body from Purl Soho in New York. It doesn't pill like cheaper felts and has a smooth feel (though I admit using cheaper felt for the flower at the head and the pillow.)
  • Leftover fabric from my first-ever skirt for the foot pads and inner ears.
  • Seed beads at the center of the flower.
  • Silk satin ribbon at the neck, also from Purl Soho.
I attached the pillow to the body of the lamb so it wouldn't get lost. As you can see, I also added a little message on the pillow! I'd love to make this again or try some of her other patterns. I know it'll go a lot faster now that I've done it once.

Have a wonderful week, and happy crafting!
~Amanda

Tuesday, 8 November 2011

Kid's Wash Bag Tutorial

Hello, Jane from Handmade Jane here, sharing my tutorial for kid's wash bags.
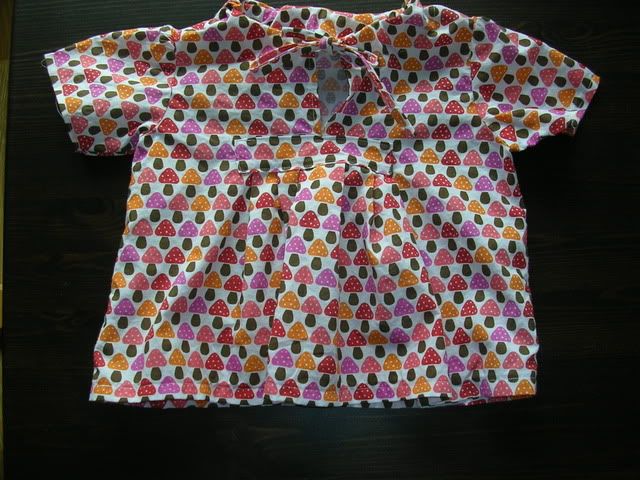
I've been selling these wash bags at craft fairs for the past six months and they've proved very popular, I think because they're small and cute!  Once you've cut the fabric out, they probably take no more than an hour to make, so they're relatively easy too.  Here goes...

You will need:
2 x outer fabric (quilting weight is good) each piece measuring 32cm long by 27cm wide
2 x waterproof fabric* each piece measuring the same size as above
1 x length of piping cord or similar, minimum 60cm long
*I get my waterproof fabric from here and it's always been good quality and good value.  I use white as it goes with everything but there are lots of other colours available.

1) Pin together one of the outer fabric pieces and one of the waterproof pieces, wrong sides together.  If you're not sure about the waterproof fabric, the right side is shiny and slippery and the wrong side is very slightly tacky.  Do the same with the remaining two pieces.

2) I make my wash bags using French seams so they're enclosed.  To do this, pin the two double sided pieces wrong sides together so you have the two waterproof layers facing each other and the two pieces of printed fabric on the outside.  Make two marks on one long side, one about 5cm from the top and one 1.5 cm from the top.

3) Using a narrow seam allowance (about the width of your presser foot is fine), start at one top corner and sew down that long edge, along the bottom edge and up the other side, stopping at the first mark.  Backstitch a few times. Continue from the 1.5cm mark to the top of the fabric, backstitching again.
You should have a small gap of about 3.5cm at the top of one long side
4) Cut all threads and trim seam allowances right down.  Cut corners on a  diagonal.Turn the bag inside out and poke the bottom edges with a paintbrush or similar, so they're nice and pointy. Press (the waterproof fabric is fine to press on a low heat setting but if you're worried, use a cloth).

5) Now we're going to do exactly the same on the inside of the bag.
Using a large enough seam allowance to encase the first seam, sew along the folded edges of the fabric, starting and finishing at the same places.  That's your French seam!
Look, no unfinished seams wafting about
6) Now the next bit looks a bit unorthodox, but it will really help when you come to thread the cord through.  Trim the two top edge seams down to where the line of sewing starts again.
7) Press under 1.5cm of the top raw edge all the way around.
Top edge (about 1.5cm) folded over and pressed
8) Then press under the remaining 3.5cm.
Top edge hem
You should now have a nifty little hole for your cord.

9) If you want to add your own label, now is a good time so that the stitching doesn't show through on the outside.  Unfold the top hem and sew on your label about midway across.

10) Fold under again and sew all the way around the top edge, starting and finishing at the hole you've created.  Backstitch a few times by the entry hole for extra strength.  Press.

Now for the fun part....
11) Piping cord tends to unravel at the ends so I wrap a small bit of sellotape to each end to stop this.  Secure a safety pin to one end of the cord and feed through the hole until it emerges at the other end.
Ensure both ends are of equal length then tie a knot near the cord ends.  And that's it!  You have yourself a very professional looking waterproof wash bag.
Obviously play with size if you want it to hold more or want to make one for adults.  The size in this tutorial is roomy enough for a child's toothbrush, toothpaste and flannel.
If you're making one with a baby in mind then it's also the right size to hold a couple of nappies and a pack of wipes.

I hope this tutorial is useful, if anything doesn't make sense, please shout.  And if anybody makes a wash bag I'd love it if you sent me a link.  Good luck and happy sewing!  x