Showing posts with label accessories. Show all posts

Sunday, 25 December 2011

I'm still technically not done, but...

If you can't tell by this post, I'm a procrastinator. Thought I'd recap what I was able to give out (and technically finish) these past couple days, though I'm still needing to finish a couple more gifts. I hope all of you had a wonderful holiday and that everyone enjoyed your amazing crafty gift goodness!

Another pleated clutch, with layered fabric

Ginger schnapps, in single size jars

Shortbread

Cockroach ornaments, based off of Very Purple Person's tutorial

Poorly self-drafted capes

Felt-applique t-shirt

Diaper clutch, again poorly self-drafted

Earthworm ornaments

Friday, 23 December 2011

Extreme last minute crafting

Hello again, Aleah from no time to sew with my last (last minute) crafty gifts. First up, made the night before it was gifted, a couple things for a work friend:

The first is a purse organizer and a small zipper pouch. She always wants to change her purses to match her outfits, but complains about what a pain it is to transfer all her purse contents all the time, so I thought this might help. It's basically a strip of pockets that she can fill with purse stuff, roll up and stick in one purse, then pull it out and move it to another purse easily. I just winged the construction, more details here. The zipper pouch is from this tutorial.
The second item is this super simple jersey circle scarf. This has got to be the easiest gift of all time to make. I bought a third of a yard of jersey from the bulk bin at my local fabric shop. I trimmed off the selvages, then used a ruler and rotary cutter to make the long edges nice and straight, and sewed the short ends together. Done. So if it happens to be Christmas Eve and you're one gift short, might I suggest a jersey circle scarf? I think it took me longer to buy the fabric than to make the scarf, seriously.

I also made my mom a case for the Kindle Fire my dad is getting her:
It's basically from this tutorial, resized for a Kindle (luckily, it turns out that the dimensions of the Fire are the same as my regular old Kindle, so I made this case the same size as one I made earlier in the year for myself). I lined the case with a scrap of black corduroy left over from a skirt I made last year. The lining is visible around all the edges, of course, because my lining always seems to end up bigger than my outside fabric for some reason, but I'm just going to pretend it was intentional since it kind of looks like trim. Here it is open, with my Kindle in it. The bird screen saver seemed appropriate for the fabric (it's Alexander Henry's Bird Seed, which my mom actually gave me last year because she liked it but couldn't think of anything to make with it!)
So woo-hoo, Christmas Crafting complete! Have a Merry Christmas, everyone. May it be filled with family, friends, food, and plenty of crafty gifts too!


Whew! Almost finished

Life got away from me the last month.  Apparently trying to make Christmas gifts and starting a blog while working a full time + part time job was not a good idea.  ;)

I want to share some of my finished (as of 10 minutes ago) gifts.
For my two nieces:
 The skirts are the circle pattern from Favorite Things - easy and fun to sew.


The pleated purses are from http://mommybydaycrafterbynight.blogspot.com/2011/10/pleated-purse-tutorial.html .  The pleating takes a bit of time but the instructions for these are great!

We also gave away over 30 jars of homemade jelly.
And my homemade vanilla and lemoncello is ready to decant and bottle up.
  One of my New Year's resolutions is to get regular about blogging!  I received a pressure cooker for my birthday so I anticipate more canning and my fabric stash is getting out of control so sewing will be happening.
   I've really enjoyed seeing the pictures and reading about everyone's gifts.  Thanks so much for sharing and inspiring me.
    Happy Holidays!

Thursday, 22 December 2011

Pillows, Snoods & Table Decorations!

Hi everyone! It's been awhile since I posted here due to some unexpected travel, but here's what I've been up to in the crafty Christmas world:

Pillows
I made these pillows for my sister from fabric she bought on our trip to Hawaii last year (Kapaia Stitchery on the island of Kaua'i, great prices!). These were supposed to be for her birthday in February (oops), but better late than never! I bought pillows from the craft store and just sewed 2 fabric pieces together and flipped them right side out. I slipstitched them closed after inserting the pillow. I bought the blue fabric to make a dress, but borrowed some of it here since I thought it made for a more complete group!


Snood Fever Continues!
This is my version of the snood made world famous by Karen from Did You Make That? I made 3! This snood is made from Merino wool that I bought at the Brooklyn General Store in Brooklyn, New York and was my first knitting project in years. I started it in New York and finished it in Virginia! This one went to my friend who is heading back to France next month. Should keep her nice and toasty.


Table Runner/Napkins

And finally, I made a table runner and napkins for my mom, as she loves decorating for the holidays. I gave them to her a bit before Christmas so she could enjoy the festiveness! For the table runner, I used sew-in interfacing to weigh down the lighter weight reindeer cotton and found that slowly ironing out the bumps in the fabric helped keep the fabric flat. I also used my walking foot which helped keep the fabric layers from shifting.

The napkins were made using the rolled hem setting on my overlocker. It's the first time I've used this feature and I love how it turned out! It looks like the edges are bound with a narrow bias tape and it was so fast and easy to make.


Happy holidays, all!

~Amanda from Sewin' in the Rain

phew . . .

I thought I wouldn't finish these throws in time.


Nearly finished my shopping and wrapping - now for some serious baking!


More festive fun over on my blog

Tuesday, 20 December 2011

Oven gloves and stockings

Hi everyone! Joanne here from StitchandWitter. I've been thoroughly enjoying all your crafty Christmas makes so have snaffled the guest login from Tilly to add my own small post. This weekend, I've been whipping up a bunch of oven gloves for my mum and sisters, using this tutorial. It's been so easy and a great way to do a bit of stash-busting. I used insulated wadding which is extra protective for handling hot stuff so hopefully they're practical as well as unique.

On my sister's request I also put together a few Christmas stockings for her.... dogs! Yep - these are for Nancy, Clint and Nacho. Hope they appreciate them :)


I've been so inspired by all your crafty makes - I've already got loads of ideas for next year. Merry Christmas and a Happy New Year to you all xxx

The last one!


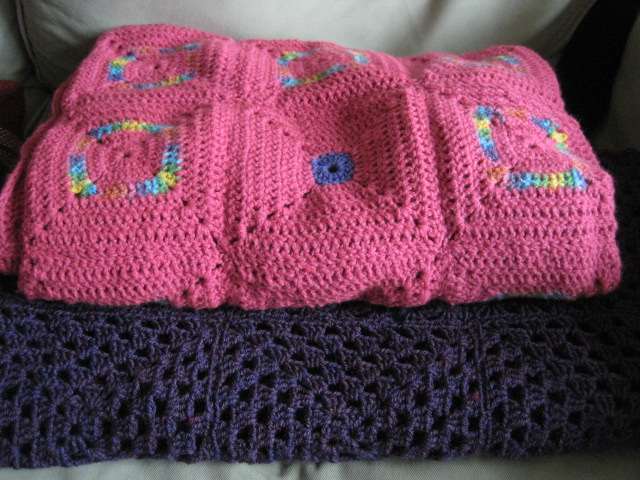
I finished my last Christmas present! These are for my two little sisters. They asked for some ear warmers like they had seen in a shop, but in their favourite colours :) They're very simple, an inch of rib, two inches of stockinette, and another inch of rib. Oh and two huge pom poms :)
I hope they like them!

Thursday, 15 December 2011

Last minute gifts

Well, I left my crafting a bit too late and so I only have two fairly meagre offerings for you all!
I finished both of these last week, and I've written more about them on my blog.

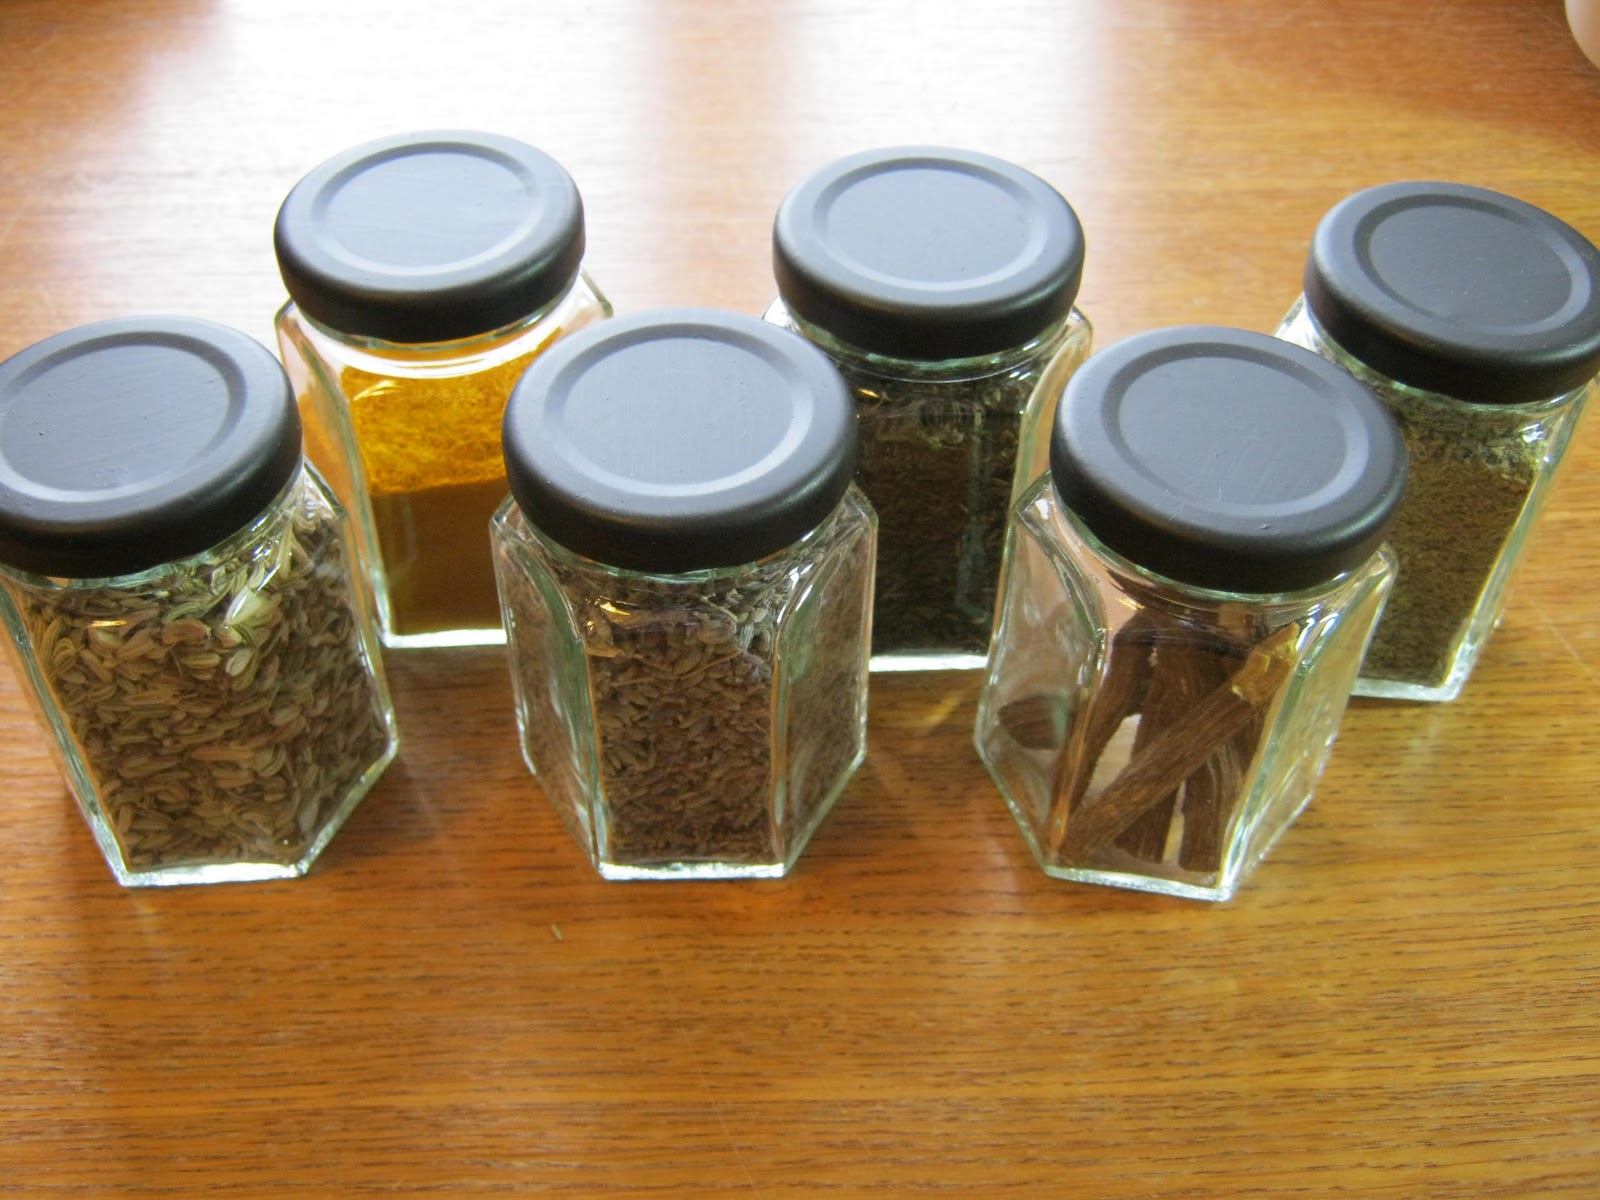
These are jars filled with herbs, and I've painted the lids with blackboard paint so that they can be relabelled easily. I'll give them with a chalk pen once I've written on them.

This is a bag for my Mum's knitting to go in while she commutes each day. It's a simple square with rounded edges and is lined with cotton wadding. I used a magnetic clasp which is under the decorative button.

Hope you're all further advanced than I am!

Monday, 12 December 2011

White Elephant wristlet


I've got plans to make about two or three more of these types of bags, based off of A Lemon Squeezy Home's tutorial. I've only got this one completed so far, but thought I'd share now just in case anyone is interested in using the tutorial. I added a strap so that the bag could be a wristlet, which is more portable in my mind than just a clutch.

I made this one for the white elephant gift exchange at work. The owner of my company (male) got it, and I felt a little bad that he ended up with it. But he said that he'd plan to use it to hold his tees when he goes golfing. Go figure.


Sunday, 11 December 2011

Rosey rosettes


Hi all!

My name's Juliet and I blog over at The Crazy Gypsy Chronicles. It's been so good to see everything that people have been making this year, I've been learning and being inspired so much!

This Christmas I had grand plans of making ALL of my Christmas pressies, but being a beginner crafter/sewist/everything I haven't been so successful.

However, I have made these sweet little shoe clips/ brooches for my boyfriend's family's Secret Santa. Each couple brings one girl gift and one boy gift as a surprise pressie for another family member. Given the size of his family, this is a good plan!

These were so simple to make and are budget friendly. To make these you need:

- Shoe clips/ clip on earring bases (I used these as my local bead shop had no shoe clip bases in stock)
- Fake flowers, leaves optional
- Craft glue
- Wire cutters


Step 1: Using the wire cutters, snip your flowers from their stems, as near to the base as possible. I tried scissors, then a stanley knife but wire cutters made this a cinch.

Step 2: If you want to add leaves, pick some pretty ones and snip these with a bit of a stem.

Step 3: Cover the base of your clip with craft glue, and arrange the leaves and flower head on top. Press it down firmly and check to see if the stick is going to be good and strong. I'm afraid I have no photos of this stage as I was, being a clumsy person, covered in craft glue and dared not to touch my man's expensive camera with sticky fingers.

Step 4: Leave the flower clips, upside down, overnight to dry.


And you're done! Wrap prettily and gift away!

I hope that this inspires some of you - these would be excellent stocking fillers and are so quick to put together they would make great last-minute gifts too!

Happy Christmas crafting all!
Saturday, 10 December 2011

A clutch and two wallets

Hi, it's Aleah from no time to sew. I've finished a few gifts! Having sewn garments exclusively for a while, I'd kind of forgotten how quickly little bags/pouches go together (and how little fabric they use), and I was able to finish these three things in two evenings - crazy (for me, anyway)! First I have gifts for my interns at work, both from both from terrific tutorials from Noodlehead:

The top one (for my female intern) is the gathered clutch, a fun take on a regular zipper pouch that is really pretty and not really much more effort. I added a removable wrist strap by sewing a tab with a d-ring into the side seam and attaching a strap to a tiny dog clip. Her favorite colors are purple and black, so I was glad to find this fabric. The bottom item (for my male intern) is the zippy wallet. I love the pearl snap on the little tab! I added a key ring in case he wants to clip it to his keys or belt. It's so hard to find adult-male-appropriate fabric, but I like this plaid. It's a thin shirting, but I interfaced it with a sturdier interfacing. Check out all the other great tutorials at Noodlehead if you need a last-minute quickie gift!
I also made this wallet for my mom:

The pattern is this one from Dixie DIY. I made just a couple changes - I used a magnetic snap rather than a button/loop, only put in one money pocket, and I made my zipper pocket the same way as on my messenger bag instead of how she instructs. I love this fabric!
So that's all for now, but I hope I can keep up this pace for a while longer and have some more things to share soon. Happy Making!

Friday, 9 December 2011

A -Slightly Psychedelic- Pompom Wreath

Only 2 weeks to go...!

Elisalex here, howdy!  With the majority of my presents done and ticked off the list, I'm now turning my attention to decorating...


For some reason, traditional Christmas Wreaths have always felt a little morbid and ominous to me.  Dark, spiky and somewhat reminiscent of funerals.  Beautiful, but depressing.  But then I saw this Pompom Wreath, and this tutorial from JCasa*Handmade, and I knew what I had to do.


For the wreath's structure I used some foam tubing from the hardware store and a coat hanger to create the shape -


Then made a bunch of pompoms in my favourite reds-dusty pinks-off whites colour combination and tied them securely onto the foam tubing.  To finish I wound around some woodland mushroom fairy lights I had (which I think look a little too acid-y when switched on, but perfectly cute -and innocent- left off) and attached a grosgrain ribbon loop so it can be hung. 


But no way is this wreath getting hung outside... I've become very fond of its sweet, not at all morbid or ominous, and very soft self.  I couldn't possibly risk it getting rained on or stolen, and most of all I want it inside where can appreciate it.

Wednesday, 7 December 2011

Bags, bags, bags! (and tutorial links)

Hello fellow Christmas Crafters. This is Andrea from Stitch Parade checking in with an update on my pressie making progress thus far. I must confess it’s been great reading about your own progress and I’ve been inspired by the great present ideas you’ve all had.

With less than 3 weeks to go, I’m about 80% done but it’s been raining cats and dogs in Toronto for days so I’ve not been able to get pictures of all my makes. Today I’ll show you what I’ve got so far in the bags department. First up, toiletries bags for my dad and brother:


I learned to make these bags a couple years ago at The Workroom, a local sewing studio, but the process is super easy and I even fund an online tutorial for you over here. For these bags I was able to up-cycle wool materials from hardly worn trousers I rescued from a friend’s Goodwill pile. I figured the look was manly enough. What do you think?


For the ladies I made clutches using a pattern also from The Workroom. I used some leather scraps for two of them, quilting cotton for another two, and the leftover embroidered border denim from my Ginger skirt for the last one.


All bags, except for the leather clutches, are interfaced for structure, include an internal pocket, and are also lined with contrasting cotton fabric for a fun pop of colour.


If you are interested in making similar clutches I found this handy tutorial here. As an FYI, the frames can be bought from several vendors via etsy.


Hopefully we get some sunshine this coming weekend so that I can photograph some of the other presents I’ve made. Wishing you all days of absolute present making productivity over the next couple of weeks!

Messenger Bag Tutorial

Hi, I'm Aleah and I blog at no time to sew. I'm getting a bit of a late start on my Christmas crafting, mostly because I've been working on a production of A Christmas Carol since October so I've been practicing Holiday Avoidance in my personal life... but now I'm starting to get really excited about making presents so I'm kicking into gear!
I've just posted a tutorial for a small messenger bag, and I wanted to share it here for anyone with a bike commuter/bike lover in their lives, or just anyone who wants a cute adjustable-strap messenger bag! Here's a look at my design - it's got a three panel front with a pocket, and a bunch of internal pockets.

The full tutorial is here. Happy Making!